Creating a Context
This guide walks through creating a Context in the dashboard. We'll build an order fulfillment context that tracks orders from placement through delivery.
Open Context Settings
Navigate to Dashboard → Contexts and click Create Context.
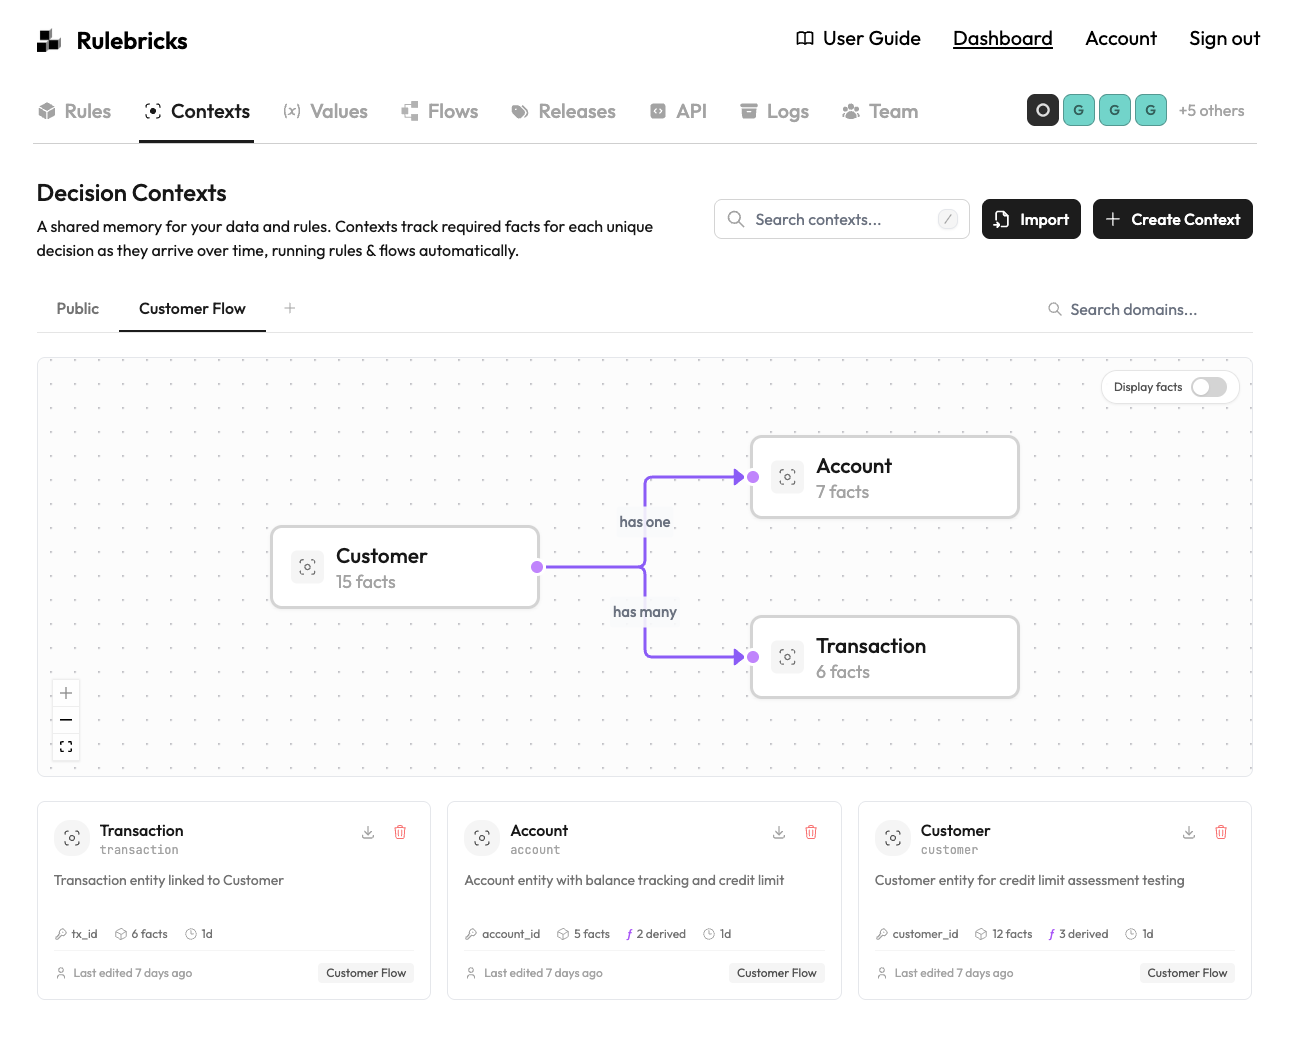
Enter a name and slug. The slug appears in your API URLs:
POST /api/v1/contexts/{slug}/{identity}Choose the Identity Fact
Every context needs an identity fact—the unique ID for each instance. For order fulfillment, this is order_id.
Set the identity fact type (string or number) and name. This becomes the key in your API URLs:
POST /api/v1/contexts/order-fulfillment/ORD-12345Define Facts
Add the facts your decision logic needs:
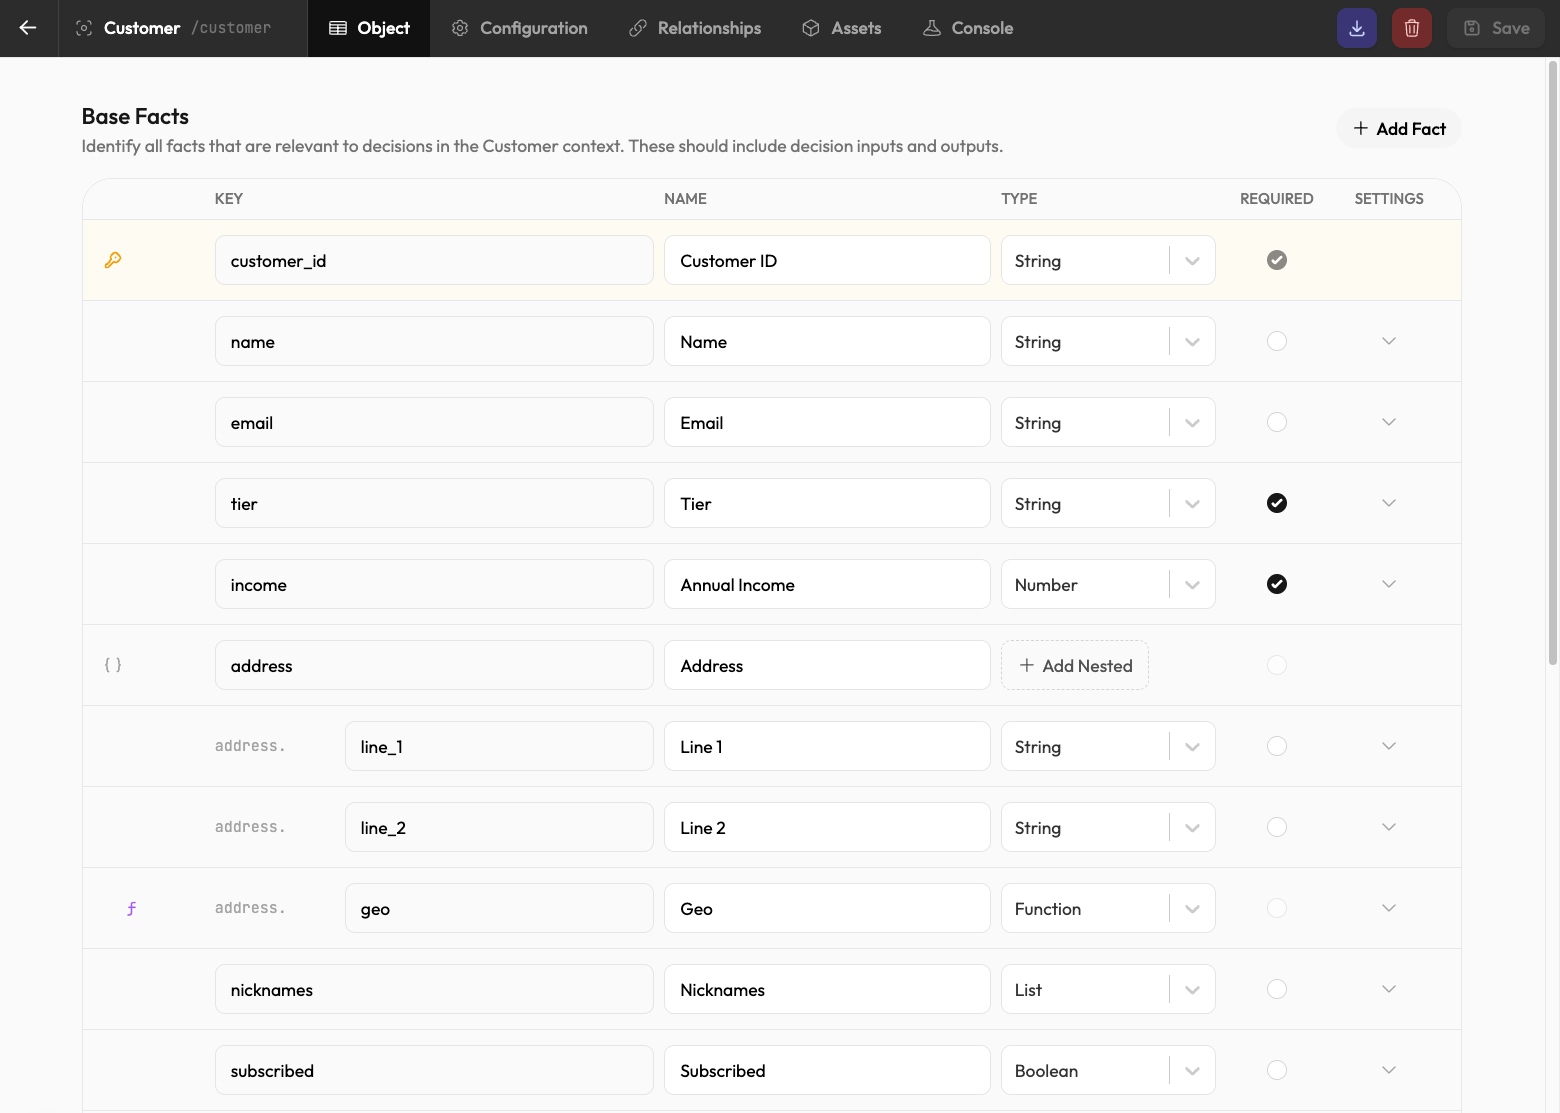
For each fact, specify:
- Name and type —
items(list),shipping_address(object),payment_confirmed(boolean) - Required — Whether rules need this fact to execute
- Output only — Whether only rules can write to it (not external submissions)
Add Derived Facts
Derived facts compute automatically from other facts. Click Add Derived Fact and write an expression:
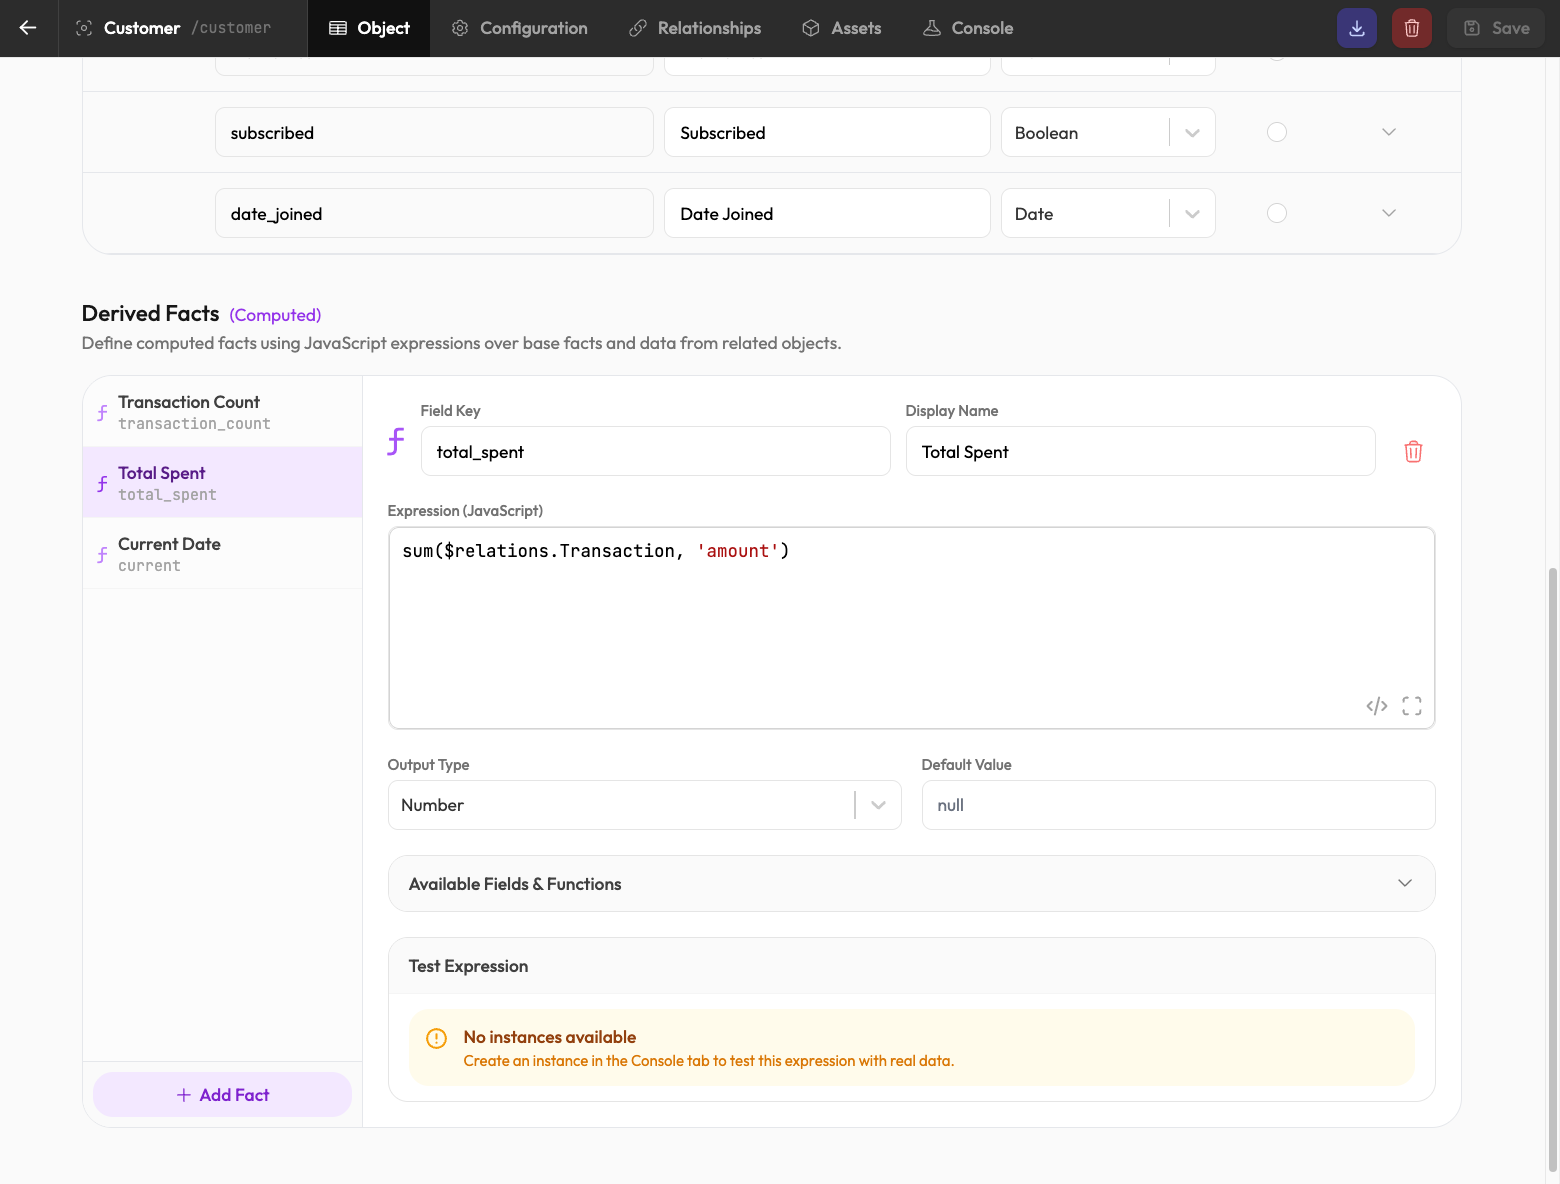
Example: calculate order total from line items:
sum(items, 'total_price')Derived facts recalculate whenever their dependencies change.
Configure Settings
Set the TTL (time-to-live) for context instances. Orders might expire after 30 days; real-time sessions might expire in 1 hour.
Optionally configure:
- Webhook URL — Called when contexts are solved or expire
- Auto-execute — Whether bound rules run automatically when ready
Save and Test
Click Save to create the context. Use the Console tab to test:
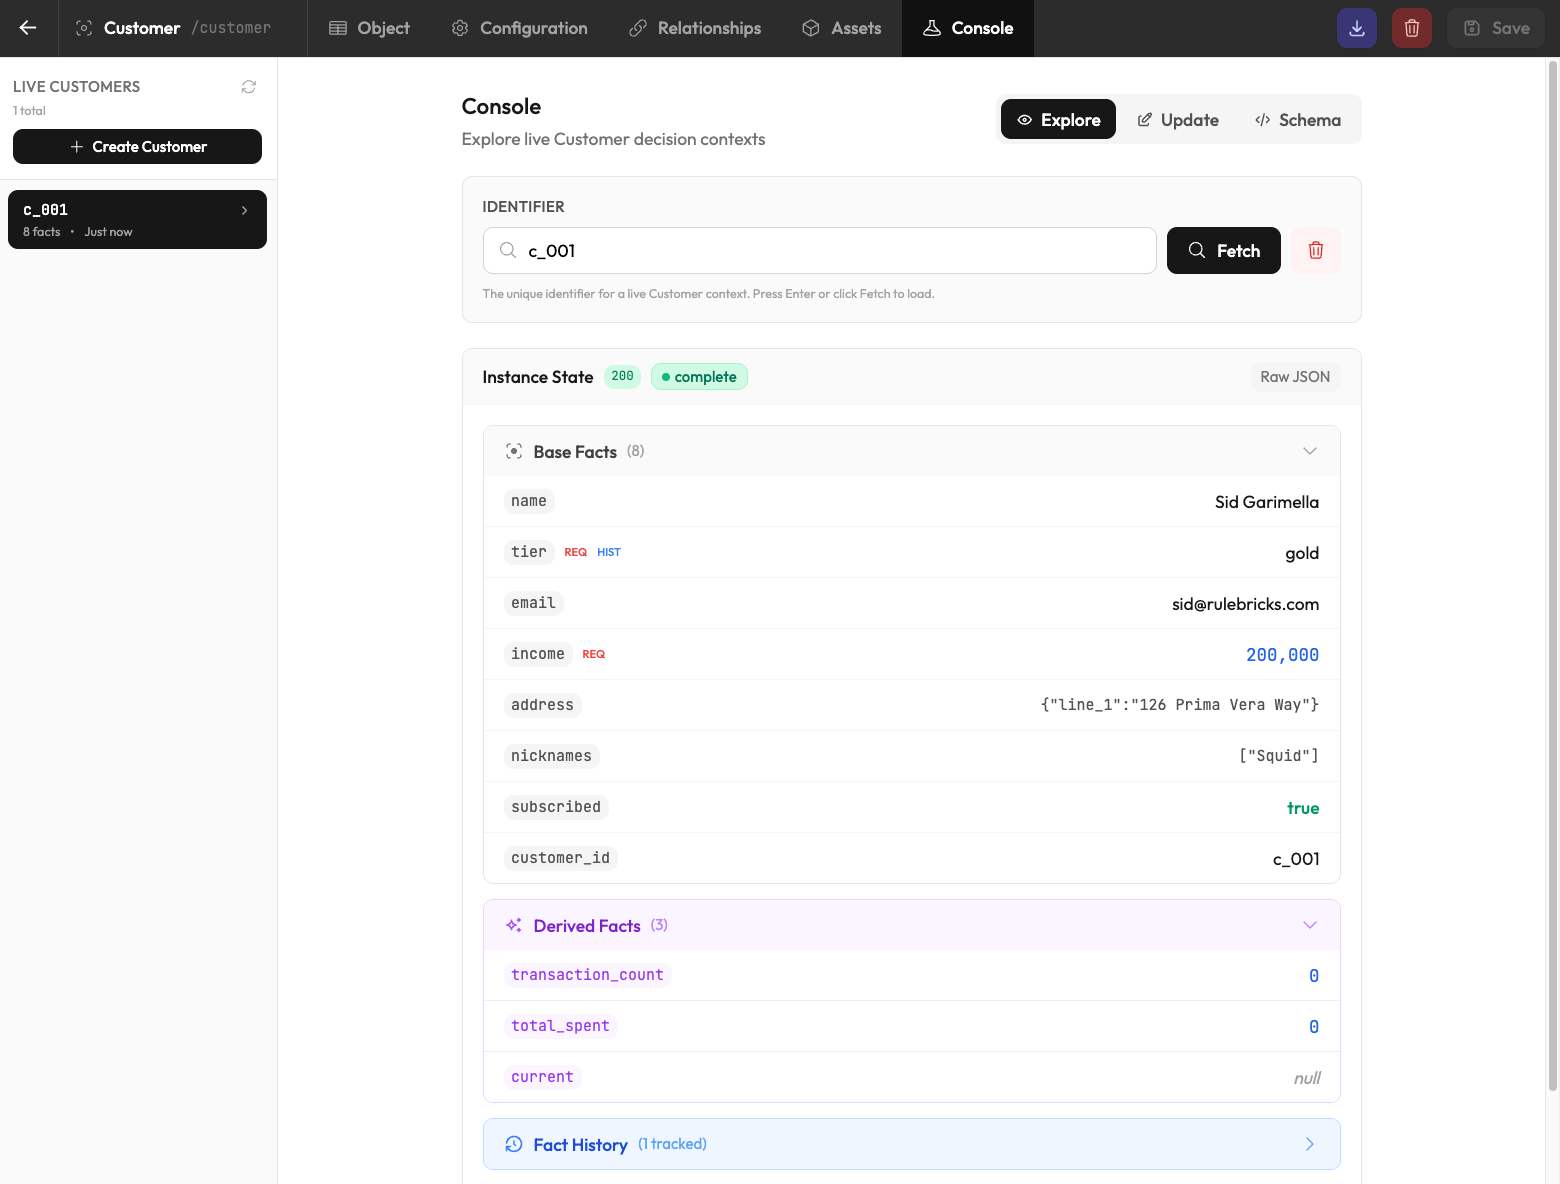
Submit facts and watch the have/need arrays update. Derived facts appear as soon as their inputs are available.
The Console is useful for understanding how facts interact before integrating with your application.
Next Steps
- Binding Rules — Connect rules to read from and write to this context
- Relationships — Link contexts together (customers with orders)