Creating and Managing Releases
With environments configured, you can begin the actual work of releasing your business logic. A release in Rulebricks represents a specific version of a rule or flow that has been tagged for deployment to a particular environment. Creating a release does not immediately deploy anything—instead, it opens a request that must be approved before the release becomes active. This two-step process separates the intent to deploy from the actual deployment, creating space for review and validation.
Starting a New Release
Open the new release modal
Click the "New Release" button in the Releases tab. The modal that appears guides you through the essential decisions.
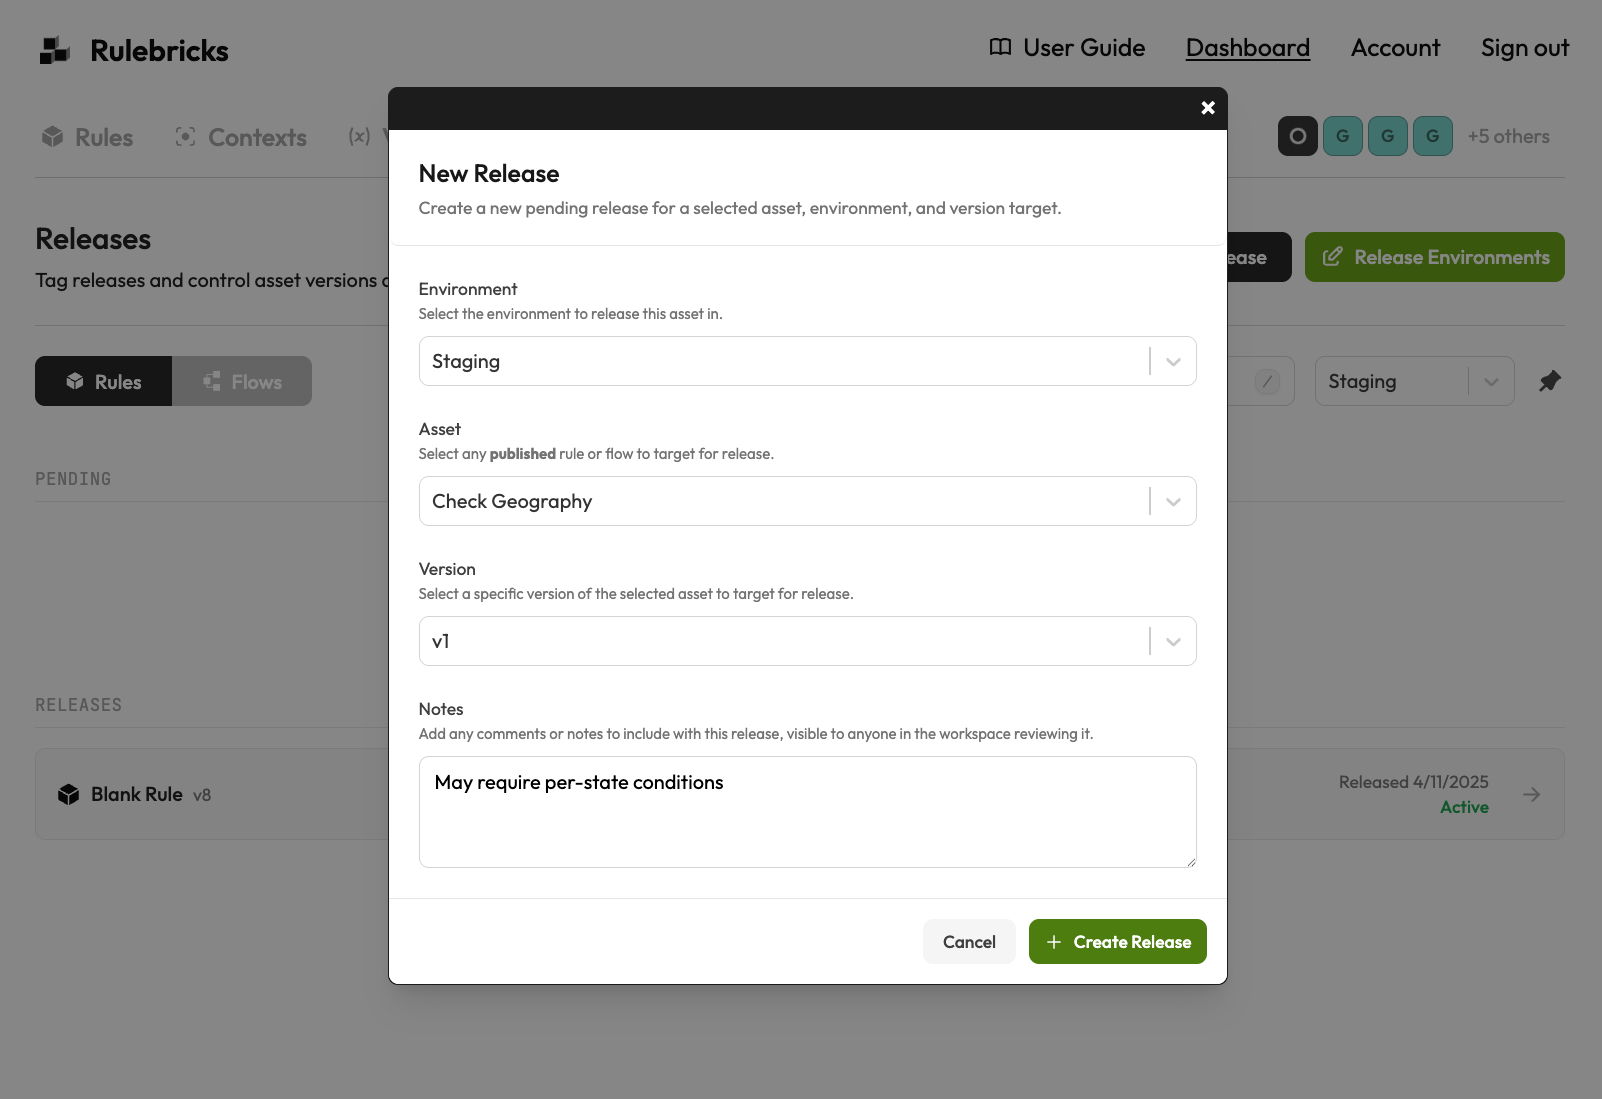
Select your target environment
The environment selection determines where this release will go and, consequently, who needs to approve it. Only environments that allow direct releases appear in this dropdown—if an environment is configured for "promotion only," you cannot create releases directly into it and must instead promote from a lower-level environment.
Choose your asset and version
The asset selection shows only published rules and flows. This constraint exists because releases target stable, versioned snapshots of your business logic, not work in progress. If the rule or flow you want to release does not appear in the dropdown, return to the Rules or Flows tab and publish it first.
The version selection lets you choose which specific published version to release. This is particularly important when you have made multiple iterations on a rule and want to release a specific checkpoint rather than the latest version.
Add release notes
The notes field provides an opportunity to document why this release is being created, what changes it contains, or what the approvers should pay attention to during review. These notes become part of the release's permanent record and appear in the activity feed.
Navigating Releases by Environment
The Releases tab organizes everything by environment because that is how most teams think about deployments. When you select an environment from the dropdown, the view updates to show only releases relevant to that specific deployment target.
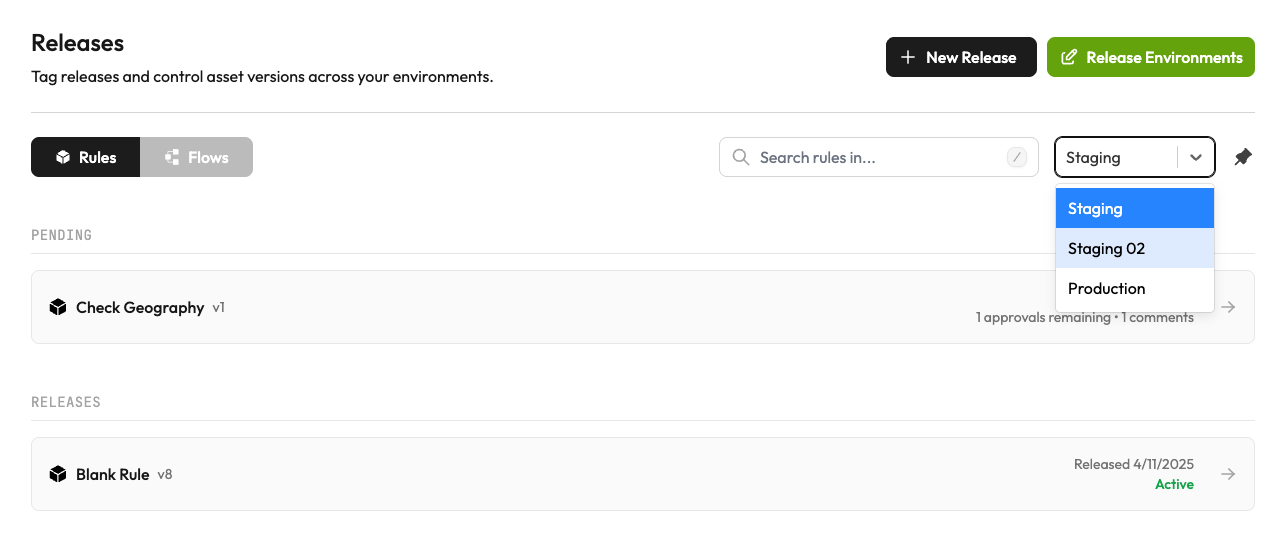
The pending section shows releases that have been created but not yet approved. Each pending release displays key information: the asset name, the version number, when the release was opened, how many approvals are still needed, and how many comments have been added. This at-a-glance view helps you quickly identify which releases need attention and their current status in the approval workflow.
Below the pending releases, the released section shows assets that have been successfully deployed to this environment. Each entry indicates the version that is currently active and confirms that the release is live. This serves as a source of truth for what is actually running in each environment.
The Approval Workflow
When you open a pending release, you enter the detailed view where the actual approval workflow takes place. This screen presents all the information approvers need to make an informed decision, along with tools for collaboration and action.
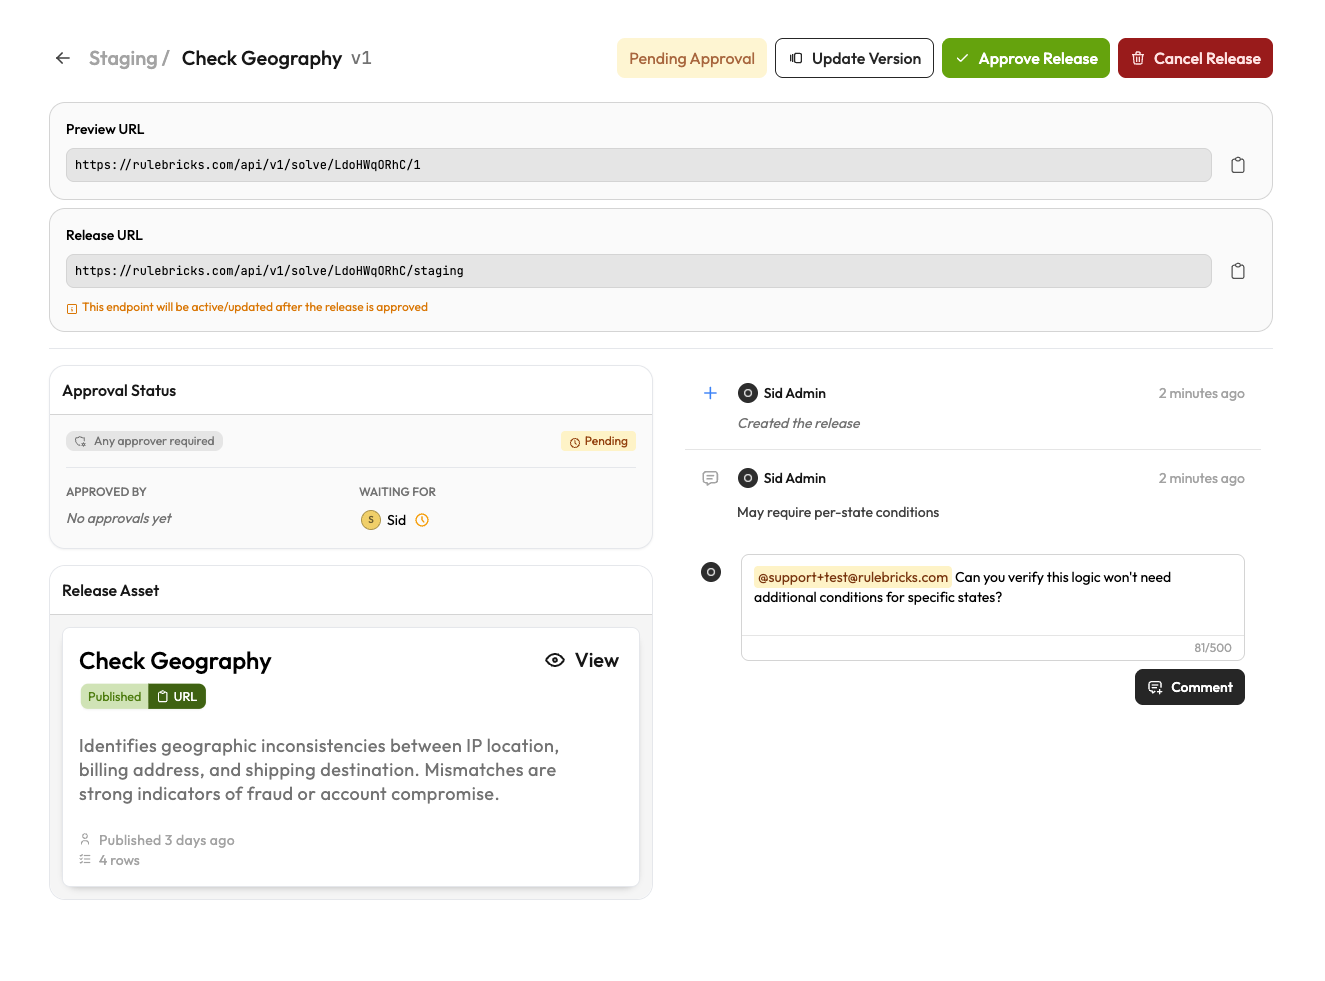
The header area displays the current approval status—"Pending Approval" for releases still awaiting sign-off, or "Released" for approved deployments. Action buttons allow approvers to approve the release, update the version target if needed, or cancel the release entirely if circumstances have changed.
The approval status panel shows who has approved the release and who is still pending. The scheme indicator reminds everyone whether a single approval is sufficient or if all designated approvers must sign off. As approvals come in, the panel updates in real time, providing clear visibility into how close the release is to going live.
The release asset section shows exactly what is being released—the rule or flow card displays the same information you would see in the Rules or Flows tab, making it easy to review what this release contains without navigating away. You can click through to view the full rule details if needed.
The activity feed on the right captures the complete history of the release: when it was created, who commented, what notes were added, and when approvals were given. Comments support rich formatting and mentions, allowing you to tag specific team members for input or flag concerns that need addressing before approval.
Promoting Releases
Once a release has been approved in one environment, you may want to advance it to the next stage of your deployment pipeline. Rather than creating a new release from scratch, you can promote the existing release to a higher-level environment. This action preserves the connection between the releases, making it clear that what is running in production came from what was tested in staging.
The promote action appears on released assets and shows only environments at the next level in your hierarchy. Promotion creates a new release in the target environment that references its origin, providing a clear audit trail of how changes flow through your deployment pipeline.
The promoted release still requires approval according to the target environment's configuration, ensuring that each stage maintains its own governance.