Setting Up Environments
Before you can begin releasing rules and flows, you need to define the environments through which your changes will travel. An environment in Rulebricks represents a deployment target—a conceptual space like "staging" or "production" where a particular version of your business logic will run. The configuration of these environments determines not just where releases can go, but how they get there and who has the authority to approve them.
The design of your environment structure should reflect your organization's actual deployment practices. A small team might operate with a simple two-environment setup: a staging environment for testing and a production environment for live traffic. Larger organizations often require more nuanced hierarchies, perhaps with multiple staging environments for different testing purposes, or regional production environments that receive releases at different times.
Creating Your First Environment
To configure environments, click the "Release Environments" button in the Releases tab. This opens a modal where you can view existing environments and create new ones. The environment list displays key information at a glance: the environment name, its level in the promotion hierarchy, the number of designated approvers, the approval scheme, and whether notifications are configured.
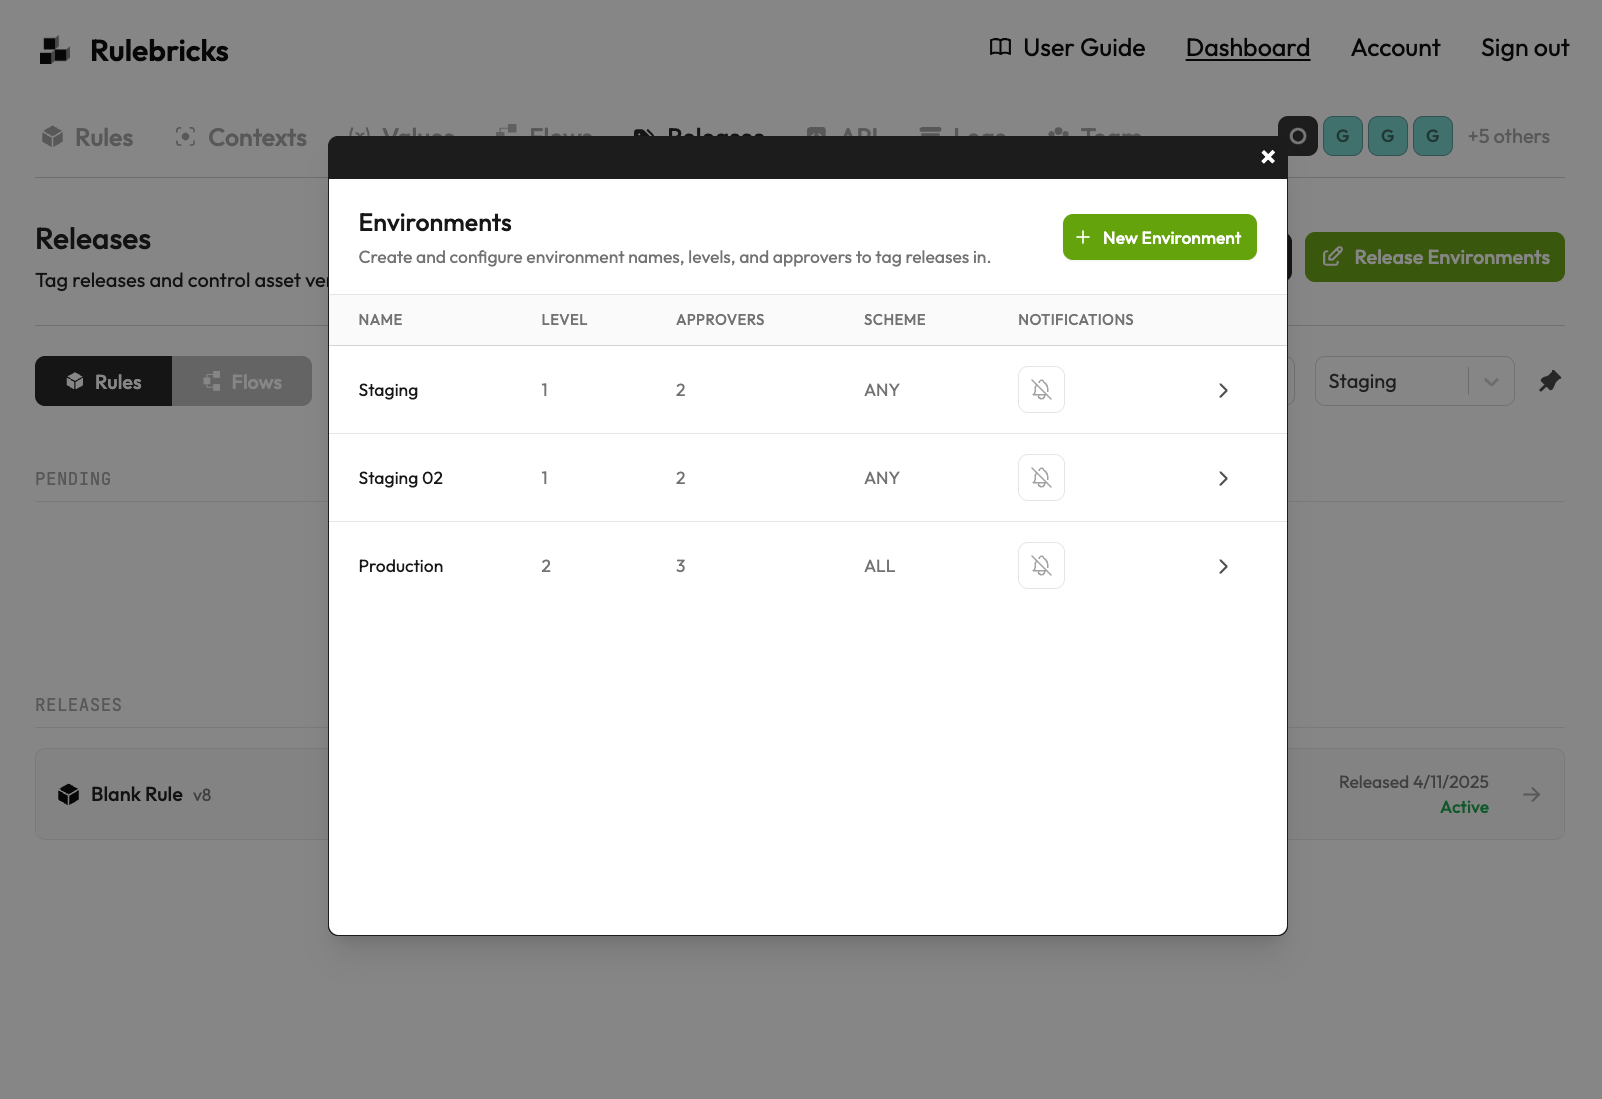
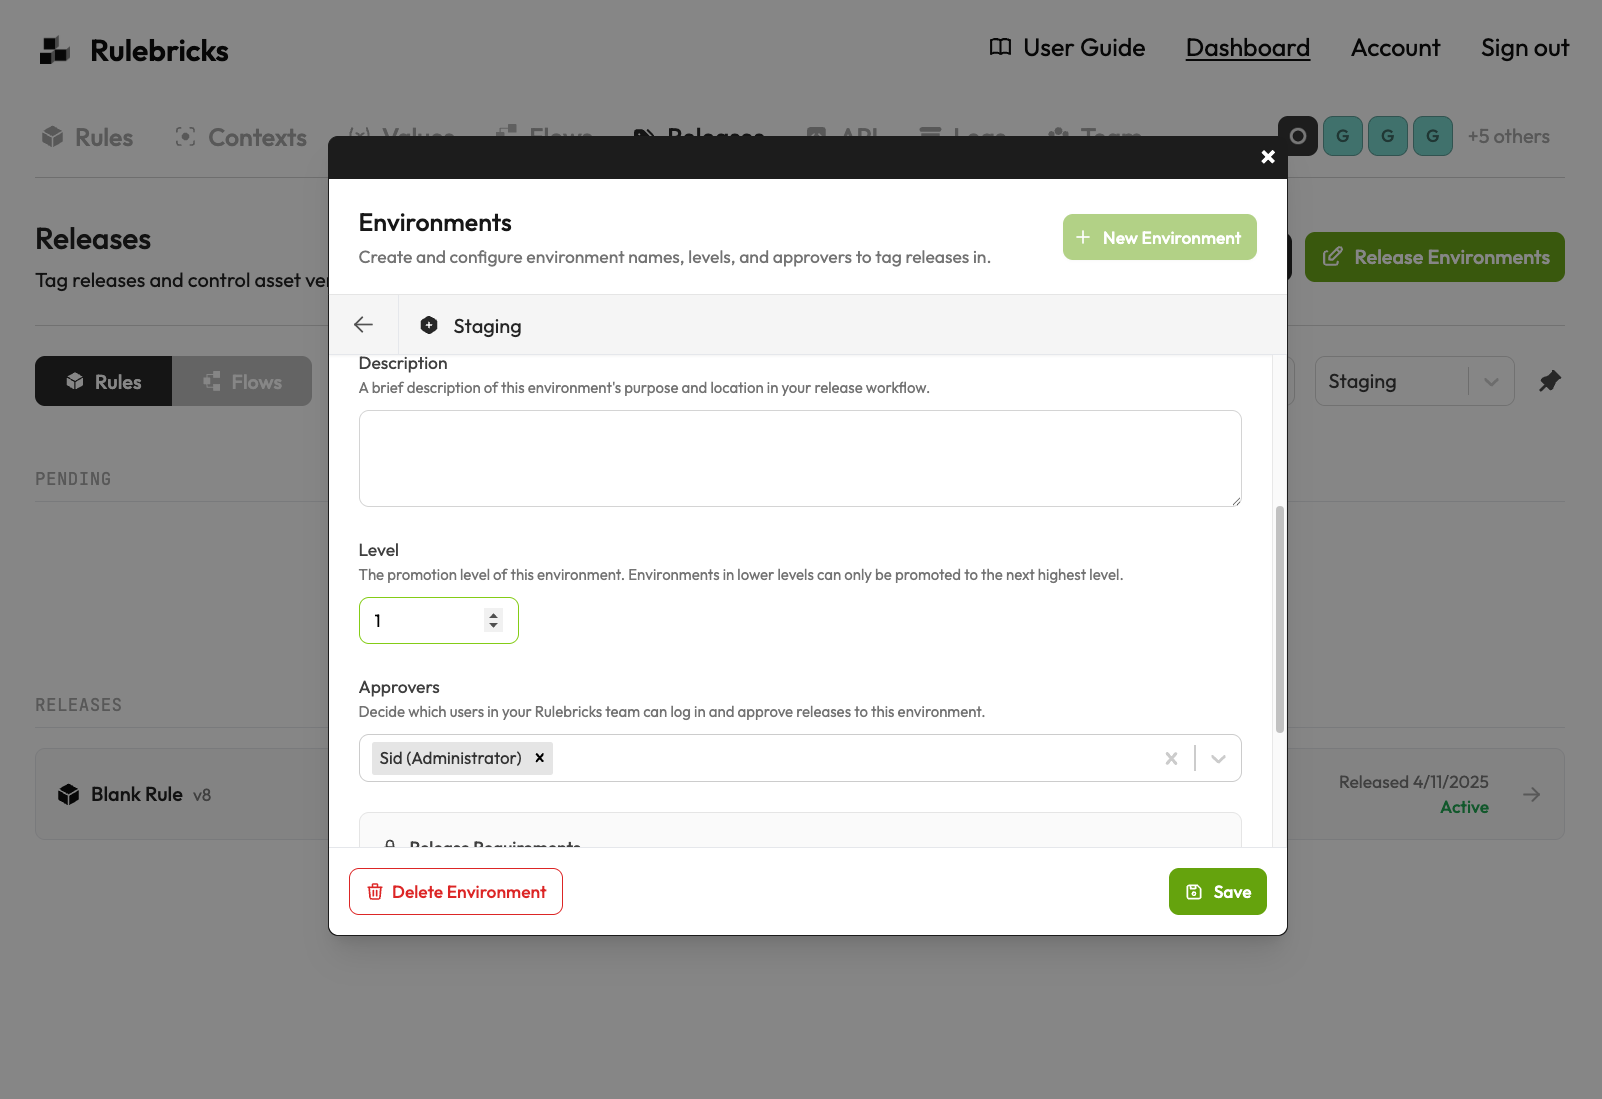
When creating or editing an environment, you define several critical properties. The environment name serves as its identifier throughout the system—choose something meaningful like "Staging" or "Production EU" rather than cryptic abbreviations. The description field allows you to document the environment's purpose and its place in your release workflow, which proves invaluable when onboarding new team members or auditing your processes months later.
Understanding Environment Levels
The level setting deserves particular attention because it governs the promotion path for your releases. Environments with lower level numbers are considered earlier in the release pipeline, and releases can only be promoted from a lower level to the next higher level. This constraint is intentional: it prevents releases from skipping stages in your workflow, ensuring that every change passes through the appropriate validation steps before reaching production.
Consider a typical three-environment setup. Your staging environment might be level 1, a pre-production environment level 2, and production level 3. A release created in staging cannot jump directly to production—it must first be promoted to pre-production, approved there, and only then can it advance to production. This sequential progression creates natural checkpoints where your team can validate changes before they move closer to live traffic.
You can also have multiple environments at the same level. This is useful when you have parallel deployment targets, such as regional production environments or multiple staging environments for different feature teams. Releases from a lower-level environment can be promoted to any environment at the next level, giving you flexibility while maintaining the overall progression structure.
Configuring Approvers and Approval Schemes
Each environment requires at least one approver—a team member authorized to approve releases into that environment. The approvers you designate should align with who has responsibility for changes reaching that stage of deployment. Your staging environment might allow any developer to approve releases, while production might require sign-off from a senior engineer or technical lead.
The approval scheme determines how many approvers must give their consent before a release goes live. With the "Any approver" scheme, a single approval from any designated approver is sufficient. The "All approvers" scheme requires every designated approver to provide explicit approval. Choose based on the risk profile of each environment: staging might use "any approver" for agility, while production might require consensus from all approvers for safety.
The approval scheme and the release creation settings are locked after an environment is created. This design prevents accidental or untracked changes to your approval criteria after releases have begun flowing through the system. If you need to change these settings, you would need to create a new environment with the desired configuration. Plan your environment structure thoughtfully before committing to it.